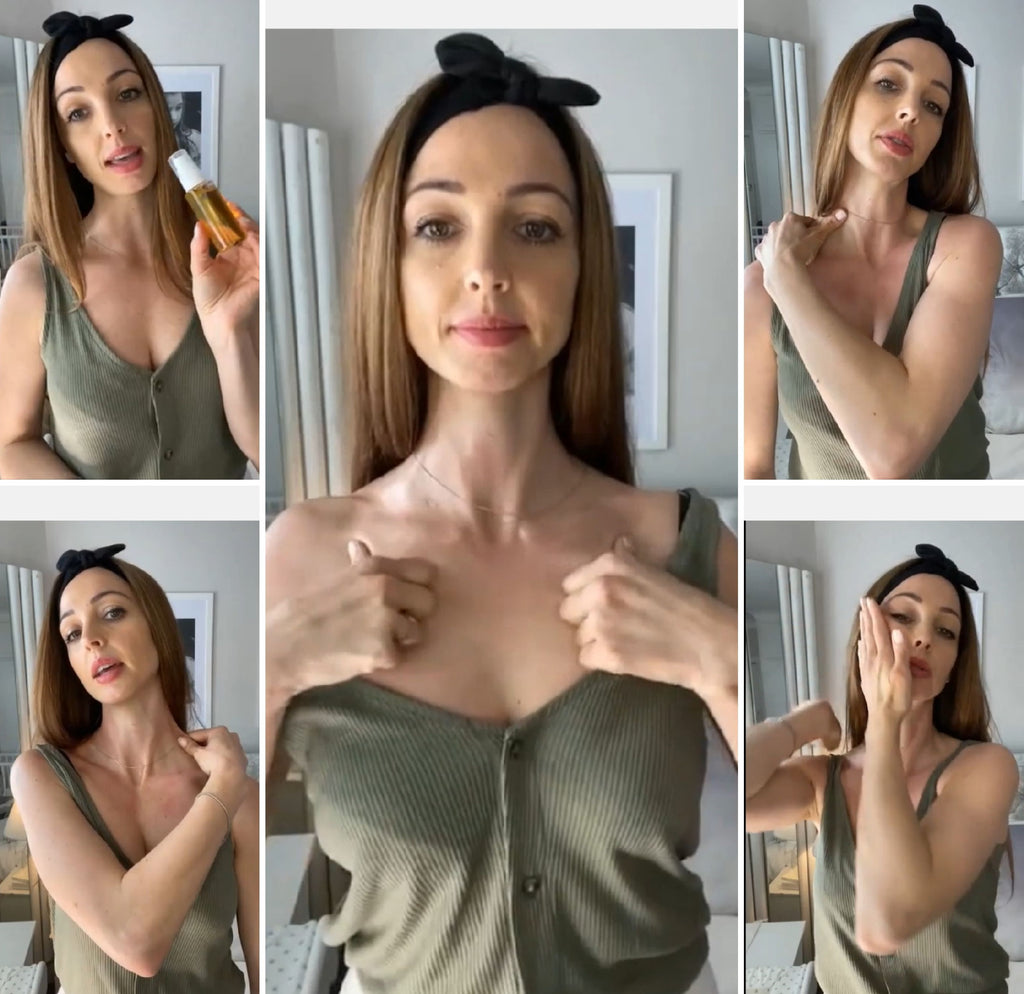
DIY Face Lifting & Contouring Massage

Massage has huge benefits for skin, so we teamed up with the lovely Taryn Williams who uses our Revitalising Face Oil to demonstrate an easy to follow lifting and sculping massage for the face and neck. Our face oil is a great treatment product that can be used everyday as part of your skincare routine, and is also perfect to help with facial massage as it has a gorgeous consistency, and is filled with lots of skin boosting plant ingredients. It is just one of our natural anti-ageing face products.
The massage that we are outlining is for the face, but also incorporates the chest and head, as Taryn believes this is an essential part of lifting and contouring. Taryn has been a facialist for 20 years, so her advice and methods are the best. To carry out your own anti-ageing massage at home follow the steps below. There is also a full video where Taryn demonstrates the steps in detail, it can be found on You Tube here. Below we have outlined the key steps for this gorgeous massage.
Step 1. Taryn advises that we cannot lift the face muscles without thinking of our chest and neck first. So, this starts with the chest and releasing the muscles here, which are quite tight for many people. Many of us are also a little rounded in the shoulders, which puts an extra strain on our neck muscles, so we want to release all of this too. Grab our 100% Natural Face Oil and apply it all over the chest and neck, but without dragging. Put enough oil on so that it is not too greasy, but when massaging skin there will not be any drag. Then use your knuckles and knuckle into the tight chest muscles.

Step 2. Then move to just underneath the start of the collar bone. There is a dip here and place the right thumb into the left side and apply pressure while moving the thumb over to the shoulder. Then use the heel of the hand to massage the shoulder area. Do this a few times on the left and then move to the right side.
Step 3. Next go up and down the neck using your thumbs. For the left side use the right thumb and stroke upwards with good pressure, plus ease the pressure off when coming back down the neck. And then change sides. Now use the thumbs to move up the neck and stroke behind the ears to release tension.
Step 4. Now we are ready to move onto the face, so apply some more of our award-winning face oil to the sides of the face, chin and forehead. Start with the whole hand sweeping up the left side of the face. Here the emphasis is in the heel of the hands and picking up the cheek muscle. Once you get the hang of it you can really build speed to lift the muscle and create blood flow. Blood flow is really important to bring the oxygen to the skin and the muscles. Change sides and again start off slowly and then speed up to capitalise on the circulation.

Step 5. Next make a heart shape with your thumbs and forefingers, and then straighten the shape to a rectangle. Then rest the fingers on top of the left cheek bone and work the thumbs below the cheek up to the top fingers. The fingers are really just resting there and perhaps pressing in slightly, but not pulling down. Repeat a few times before changing sides.
Step 6. Bring the hands onto the back of the head and interlace the fingers slightly placing the thumbs by the temples facing down, to work the sides. Bring the thumbs up into the temples with a nice pressure. Repeat a few times and move over the skin including the outer eye area and the crows’ feet plus working to the temples.

Step 7. Next bring the thumbs upside down to the bright light pressure point and then smooth the thumbs up to the arch of the brow and into the hairline. Apply a nice firm pressure in this really lifting move.
Step 8. Now bring your thumb to your mid eyebrow, press and take it along to the end of the eye brow and take it to the hairline. Then continue to work the thumb sideways underneath your cheek bone area, contouring the cheek bone. Then move to corner of your mouth out to the hairline. Change sides and always use a lifting upwards motion and strong pressure with the thumb.
Step 9. Then give your hands a little breather by bringing them to a prayer shape and opening them up and resting your chin and face into the palms. Lean into the hands with a nice firm pressure to lift up the cheeks. Then use the heal of the hands to lift those cheeks up, you should feel some tension really releasing around the cheeks.
Step 10. Then put your right hand over your head to the left side. Support your skin with the left hand and use the fingers of the right hand to lift up the cheek area with stroking motions. Include the nasolabial fold (the lines from the mouth to the nose) moving to the left edge of the face towards the ear. Finish off at the hairline moving the fingertips to the outer corner of the eye up to the temples and into the hairline. Repeating on the other side.

11. Then start to finish off with some thumb movements and the hands over the sides of the face, starting at the base of the jawline and working up to those temples again. Use this technique all the way up the face, including the corners of the mouth and temples. Then move to the forehead and press the ring finger and the fore finger into the start of each eyebrow and press plus hold. Here add that middle finger plus lift and span out to the hairline, plus then take it into the hairline. As with all the moves make sure that both sides are massaged and in equal amounts.
12. The last step is to work the sides of the face and take it into your scalp for a massage here, as this is where your temporalis muscle is. Then come back down the neck with sweeping hand movements on both sides to where we started. This is the end and the only thing left to do is to drink lots of water to help drain away all those toxins. Ideally this massage should be repeated twice a week for the best results.
Facial massage has gained popularity for its potential to lift and contour the face naturally. This technique involves the application of gentle, yet firm, pressure on specific points and muscles of the face. Regular facial massage can stimulate blood circulation, encouraging the flow of oxygen and nutrients to the skin's surface, which promotes a healthy and radiant complexion. Additionally, massaging the facial muscles can help to tone and lift sagging skin, reducing the appearance of fine lines and wrinkles. By incorporating facial massage into a daily skincare routine, individuals can achieve a more defined and youthful appearance without the need for invasive procedures.
We hope that you found this feature helpful about carrying out your own lifting and contouring massage. It is incredibly anti-ageing, especially when used in conjunction with our Anti-Ageing Face Oil that is full of the best plant oils to help nourish, calm and condition skin. Nakin’s range is a collection of award-winning anti-ageing skincare with cleansers, treatments and moisturisers that help to prevent and treat the signs of skin ageing. Taryn has lots of great skin wellness advice on her Instagram is @taryn_williams_ and Nakin’s Instagram profile is @nakinskincare Our full range of face care products can be found here.


Leave a comment